Veterinary Surgical Instrument Failures: Real Cases and Practical Lessons for Vet Students
Instrument failure in veterinary surgery means any breakage, wear, corrosion, or mechanical fault that prevents a tool from doing its job and puts surgical safety at risk. Case reports and audits consistently show that small defects — a blunt blade, a loose hinge, or surface pitting — can escalate into longer operations, extra tissue damage, and higher infection risk. That’s why vet training must include spotting and responding to instrument problems. This article lays out the common failure modes you’ll see, why failure stories are powerful teaching tools, maintenance and sterilization best practices, how to choose reliable instruments, and curated learning resources to build lasting habits. You’ll learn how to spot early corrosion and fatigue, run pre-op inspection checklists, and select maintenance routines that cut intraoperative risk. Practical examples and action lists help translate case lessons into everyday behaviors students can use during rotations and in clinic.
Common Veterinary Surgical Instrument Failures
Typical failures include breakage, dullness, corrosion, and hinge or ratchet faults — each one lowering performance and raising patient risk. Mechanically, repeated stress or misuse wears pivots and tips until they crack; chemically, poor cleaning and salt residues start pitting on stainless surfaces. Knowing these mechanisms helps students recognize early warning signs — visible rust, gritty hinge action, blunt cutting edges — so instruments can be removed before they cause harm. The table below summarizes common failures by instrument type, usual causes, and the immediate intraoperative risks to patients and teams. Spotting patterns — scissors dull after cutting bone, elevator tips bend under forced leverage — guides which tools to check closely before each case.
This quick reference highlights visible and tactile cues students can use during instrument checks and sets up practical troubleshooting strategies in the next section.
| Instrument Type | Common Failure Mode | Typical Cause | Immediate Risk |
|---|---|---|---|
| Scissors | Blades dulling or tip deformation | Cutting inappropriate materials (wire, bone); infrequent sharpening | More tissue tearing and longer cutting time |
| Forceps/Needle holders | Loose hinge or misaligned tips | Pivot wear; over-torquing | Suture slippage and insecure knots |
| Elevators/Dental tools | Tip fracture or bending | Excessive leverage against hard surfaces | Retained fragments or tissue laceration |
| Retractors | Surface corrosion on blades | Inadequate drying; chloride exposure | Structural weakening and unexpected breakage |
| Orthopedic instruments | Fatigue cracks in shafts | Repeated heavy loads and sterilization cycles | Implant misplacement and intraoperative delays |
This table links causes to risks so students can prioritize the most effective pre-op checks to prevent failures in surgery.
Which Instruments Break or Malfunction Most Often?
Some instruments are naturally higher risk because of their design, the forces they face, or how often they’re used — and students should treat these as high priority during inspections. Scissors and cutters blunt or deform quickly if used on bone or wire. Needle holders and forceps can develop hinge play or misalignment from repeated torque, which lets sutures slip and weakens knot security. Elevators and dental tools risk tip fractures when used with excessive leverage, sometimes leaving fragments in the field. Learn the common misuse patterns — cutting wire with scissors, levering elevators sideways, forcing sutures with dull jaws — and correct them through technique and handling practice.
Knowing which instruments fail most helps students focus pre-op checks and choose tools wisely during procedures.
What Causes Corrosion and Wear?
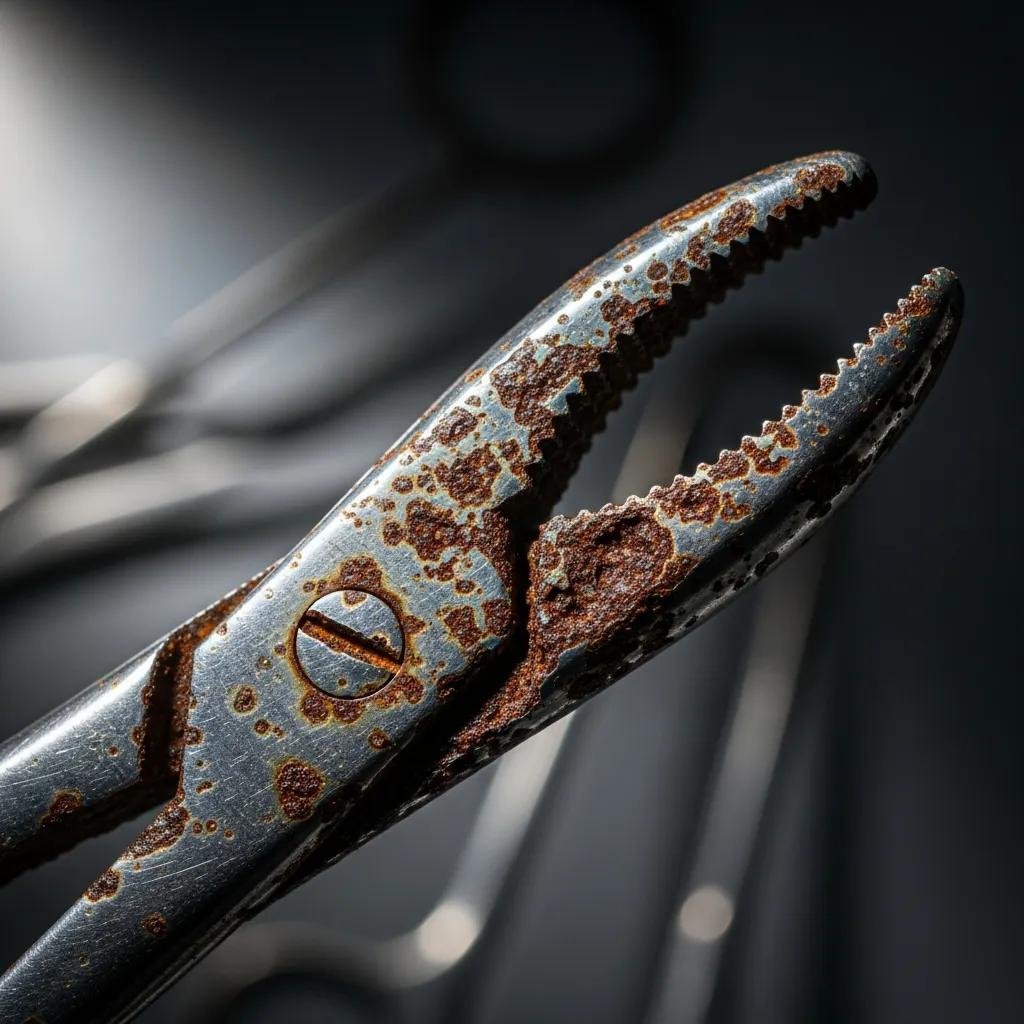
Corrosion and wear come from chemical exposure, mechanical abrasion, and cumulative sterilization stress — all of which degrade surfaces and change tolerances. Chloride solutions, dried saline, harsh detergents, and poor drying accelerate pitting on stainless steel; abrasive contact strips protective finishes and exposes raw metal. Repeated autoclaving at high heat and humidity can worsen microfatigue, especially in lower-grade alloys or when organic residues remain. Early signs are discoloration, brown or black spots, roughened surfaces, stiff hinges, or a gritty feel when parts move. Train to inspect these visual and tactile clues, and remember corrosion often starts at hinges, ratchets, and blade junctions where moisture and debris collect.
Spotting these signs early informs maintenance choices and decisions about retiring instruments, described next.
How Instrument Failure Stories Improve Student Training
Failure stories — short case narratives of what went wrong and why — turn abstract maintenance rules into memorable clinical lessons. A well-told case shows the chain of events: a blunt blade increases traction, a surgeon compensates with more force, a tip fails, and the team must retrieve a fragment. That sequence trains causal thinking about tool condition and intraoperative choices. Stories boost risk recognition and retention because students mentally rehearse responses and corrective steps, making them more likely to run pre-op checks and to speak up during surgery. Short, debriefable cases fit neatly into rotations or simulation labs and help institutionalize behaviors like mandatory hinge checks or reporting protocols for suspect tools.
This storytelling approach echoes educational research that shows learning from mistakes is powerful and underused in professional training.
Bridging the Gap: Learning from Veterinary Failure Cases
In practice, clinicians learn from both successes and failures, but failure cases are not widely integrated into current veterinary case-based learning. The literature on using failure cases in training is limited, and more research is needed to identify best practices.
Learning from failure: exploring the use of failure cases in promoting veterinary students’ real-world problem-solving abilities, H Rong, 2017
Embedding these narratives in curricula helps students turn observed failures into durable habits that improve safety and supports smarter equipment choices, as we outline next.
It’s also useful to connect education with real tools: Vettrix Supplies is an e-commerce platform offering premium veterinary and surgical instruments for equine, large animal, and small animal care. Its product catalog — organized by instrument type and species — offers concrete examples students can use when learning inspection and prevention techniques. Referencing real instrument categories such as surgical scissors, forceps, dental, orthopedic, and general surgery tools makes theoretical checks easier to match to actual models and maintenance needs.
What Do Real-World Case Studies Teach?
Case studies deliver concrete takeaways: do tactile and visual inspections, avoid compensating with extra force on compromised tools, and remove or document defective instruments promptly. One vignette might describe an unnoticed bent elevator tip that later required radiographs and retrieval, showing the cost of skipping a pre-op check. Another could recount a needle holder with widened jaws that led to suture slippage and wound dehiscence, underscoring the link between tool integrity and outcomes. Each case should close with reflective prompts — what clues were missed, what alternatives could have prevented escalation, and what reporting steps were taken — to turn stories into practice change.
These vignettes tie observation to protocol adoption and make it easier to convert lessons into daily habits.
How Students Can Apply Failure Insights to Improve Safety
Students can turn failure lessons into routine safety behaviors: use standardized pre-op instrument checklists, perform tactile hinge and blade tests, and follow clear escalation steps when faults appear. A quick team check before incision that includes instrument verification reduces surprises and creates a shared mental model; students should lead parts of that check to build communication skills. If a suspected failure occurs intraoperatively, contain the risk immediately — remove the instrument, alert the team, and document the event to preserve traceability and reduce harm. Reinforcing these actions in rotation assessments and simulation debriefs builds muscle memory and professional accountability.
These habits improve patient outcomes and clinic efficiency and link directly to maintenance and selection decisions discussed next.
Preventing Veterinary Equipment Malfunction: Best Practices
Preventing malfunctions depends on consistent cleaning, sterilization, inspection, lubrication, and timely sharpening or professional servicing. These steps preserve function and reduce failure risk: removing organic matter prevents corrosion, controlled sterilization limits thermal fatigue, and routine servicing restores hinge tolerances and cutting edges. Students should learn a clear step-by-step checklist from pre-cleaning through autoclaving, a schedule for sharpening and lubricating hinges, and retirement criteria for instruments that no longer meet safety standards. The table below lists routine procedures, required supplies, recommended frequency, and safety notes students can adopt as a practical maintenance plan.
| Procedure | Tools/Supplies Needed | Frequency | Key Safety Notes |
|---|---|---|---|
| Immediate bedside rinsing | Warm water, enzymatic wipe | After each use | Prevent residue from drying; avoid harsh scrubbing |
| Ultrasonic cleaning | Ultrasonic cleaner, mild enzymatic detergent | Daily or after heavy use | Follow manufacturer cycles; avoid chloride-containing cleaners |
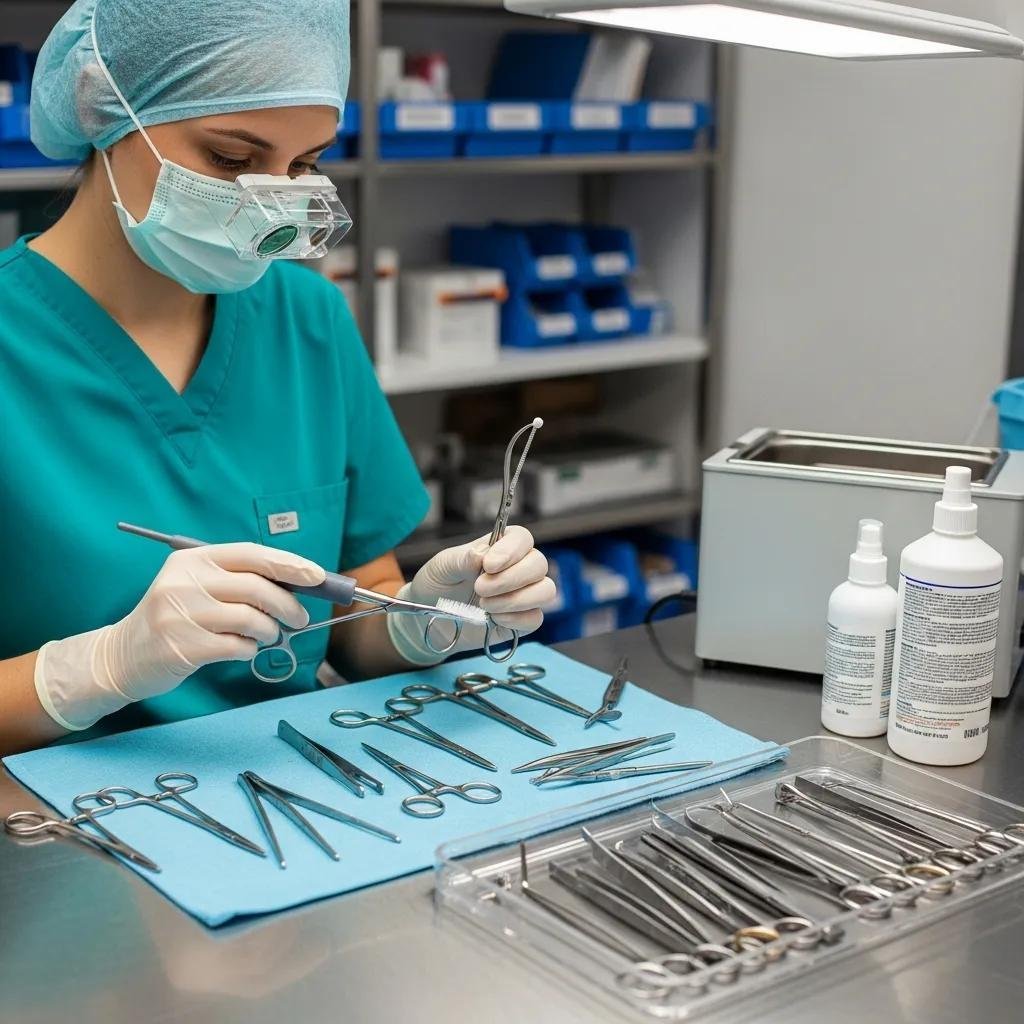
| Visual/tactile inspection | Bright light, magnifier, gloves | Before sterilization and before use | Check hinges, tips, and ratchets for pitting or play |
| Hinge lubrication | Surgical-grade instrument lubricant | Weekly or per schedule | Use approved lubricants; remove excess before autoclaving |
| Sharpening/professional servicing | Sharpening stones or vendor service | Monthly–quarterly depending on use | Remove from service if edges fail inspection |
This schedule clarifies who does what and when, helping students integrate maintenance into clinic workflows.
When sourcing maintenance supplies and services, vendors commonly offer ultrasonic cleaners, sharpening, and spare parts. Vettrix Supplies’ catalog includes maintenance categories that students can reference when planning clinic protocols. Present these items as educational resources — not hard sells — to help students draft procurement and maintenance lists for rotations.
How Should Students Clean and Sterilize Instruments?
A reliable workflow starts right after use and follows a clear sequence: bedside pre-cleaning, enzymatic soak, ultrasonic cleaning when appropriate, thorough rinsing and drying, visual and tactile inspection, hinge lubrication as needed, and compliant autoclave cycles. Pre-cleaning removes bulk debris so residues don’t bake on; enzymatic detergents break down proteins and ultrasonic cleaning dislodges microscopic particles. Fully dry instruments before autoclaving to prevent oxidation, and document autoclave cycles and instrument batch IDs when possible. Common errors — delayed pre-cleaning, chloride-containing detergents, and skipped lubrication — speed corrosion and wear.
Mastering this workflow lowers corrosion risk and keeps instruments ready for safe reuse or storage, supporting the maintenance schedule above.
Which Maintenance Routines Extend Instrument Life?
Longer instrument life depends on routine inspections, scheduled sharpening, hinge lubrication, and professional servicing when wear appears. Inspections should test blade sharpness by touch, check hinges for play, and scan surfaces for pitting or discoloration; any problem means remove the instrument and either sharpen or send it to the manufacturer. Sharpening frequency varies with workload, so document cutting performance and keep logs to guide service intervals. If you find microcracks, persistent misalignment, or heavy corrosion, retire the instrument or seek qualified repair — don’t attempt field fixes.
Clear maintenance protocols reduce intraoperative failures and feed back into smarter selection choices covered later.
How Proper Instrument Care Affects Outcomes and Efficiency
Good instrument care improves clinical outcomes by reducing tissue trauma, shortening surgery times, and lowering infection risk; it also boosts practice efficiency with predictable availability and lower replacement costs. When tools cut cleanly and grip reliably, procedures run faster and with fewer complications, improving recovery. From an operational perspective, regular maintenance reduces downtime, enables better inventory planning, and preserves budgets. The table below maps clinical, financial, legal, and ethical consequences so students see the full cost of neglecting instrument care.
| Impact Area | Direct Consequence | Practice Implication |
|---|---|---|
| Clinical | Less tissue trauma and fewer complications | Better patient recovery and outcomes |
| Financial | Lower emergency replacement and downtime costs | More predictable budgeting and longer instrument life |
| Legal/Regulatory | Fewer device-related adverse events to report | Reduced liability exposure and clearer documentation |
| Ethical | Upheld duty of care and professional standards | Stronger reputation and client trust |
Seeing these impacts ties day-to-day care to ethical responsibility and practical benefits, which the next sections explore further.
Financial and Legal Risks of Instrument Failure
Failures carry direct costs — replacements, reprocessing, longer operative time — and indirect costs like client compensation, reputational harm, and lost clinic hours. These can multiply after a single adverse event. Legally, instrument-related incidents may trigger incident reports, documentation requirements, and potential claims if harm resulted from neglected maintenance. Students should learn to document instrument condition, the steps taken when failures occur, and any intraoperative events to support traceability and compliance. Standard operating procedures for checks and reporting reduce financial exposure and legal uncertainty by creating clear records of preventive care.
These financial and legal realities underline the ethical obligations discussed next and show why thoughtful selection and maintenance matter.
Ethical Responsibility in Instrument Handling
Ethical instrument handling means prioritizing patient safety: remove unsafe tools from service, tell the care team about issues, and document concerns promptly. This duty connects professional conduct with patient welfare. Reasonable expectations about safe equipment belong in informed care; if instrument condition changes risk materially, consider disclosure and mitigation. Students should resist normalizing workarounds — reporting and correcting defects protects standards across a practice. Ethical behavior also includes advocating for adequate maintenance resources and training when gaps appear.
These norms tie together routine habits, selection choices, and patient-centered standards.
Choosing Quality Instruments to Reduce Failure Risk
Choosing durable instruments means checking materials, manufacturing standards, warranties, and matching design to clinical needs. Look for higher-grade stainless steel, tungsten-carbide cutting inserts, corrosion-resistant finishes, tight hinge tolerances, and solid manufacturer maintenance guidance. Weigh upfront cost against expected lifespan and serviceability, and favor products with clear specs and support. The table below compares instrument types with recommended material attributes and student-focused buying tips.
| Instrument Type | Relevant Attribute | Value / Recommendation |
|---|---|---|
| Scissors | Cutting insert | Prefer tungsten-carbide inserts for longer-lasting sharpness |
| Needle holders | Jaw material/finish | Hardened, well-aligned jaws for secure knots |
| Elevators | Tip construction | Solid forged tips with corrosion-resistant coating |
| Orthopedic tools | Shaft and load rating | High-strength alloys with published load specs |
| Dental instruments | Surface finish | Mirror polish and sealed joints to resist biofilm |
Selecting instruments with appropriate materials and certifications reduces failure chances and connects to supplier vetting and maintenance planning covered next.
Standards and Certifications That Signal Reliability
Standards and certifications — for example, recognized ISO device and quality standards — show a product was made and tested under consistent quality controls and can lower the risk of premature failure. For students, seeing manufacturer reference relevant medical-device standards suggests better traceability and material verification, helping separate robust products from lower-grade imports. Verifying certifications usually means checking manufacturer documentation and technical data sheets for material composition, sterilization compatibility, and recommended service intervals. Knowing these standards helps students interpret product claims and request objective evidence when evaluating tools for clinical use.
Familiarity with standards supports safer procurement choices and more informed conversations with supervisors about acceptable inventory.
How to Evaluate Suppliers and Manufacturers
Use a checklist when evaluating suppliers: quality of documentation, warranty and service options, transparent material specs, and availability of replacement parts or maintenance support. Reviews and peer recommendations help, but technical datasheets with alloy grades and sterilization parameters give objective comparisons. A scoring checklist can rate suppliers on spec transparency, service access, user feedback, warranty terms, and training resources. That structured approach helps students and clinics make evidence-based purchasing decisions instead of choosing by price alone when durability matters.
Aligning procurement with long-term safety and cost-effectiveness reduces surprises down the line.
Training Modules and Resources for Instrument Care
Effective training blends interactive modules, case studies, hands-on labs, and checklists to reinforce inspection, cleaning, and handling skills. Good modules include short video demos of pre-op checks, quizzes on failure recognition, simulated debriefs of failure cases, and procedural checklists for rotations. Curated case repositories and instrument-care guides support ongoing learning. Practically, Vettrix Supplies maintains a blog and learning hub where product examples link to maintenance guidance and case summaries — a useful starting point for students seeking applied examples tied to real tools.
Integrating these resources into curricula closes the gap between theory and practice and leads naturally to the quizzes and references suggested below.
Interactive Quizzes and Guides That Build Skill
Quizzes and guided practice focused on identification, inspection steps, and failure recognition speed up learning, especially when tied to competency checklists. Helpful quiz topics cover instrument parts and functions, step-by-step cleaning and sterilization workflows, corrosion and wear recognition, and decision scenarios for retiring or returning instruments to service. Scoring should highlight correct inspection actions and timely escalation, with feedback that includes corrective steps and references. Short quizzes before labs prime students to apply inspection skills in hands-on sessions.
These interactive elements reinforce checklist behaviors and create measurable improvements in competency.
Where to Find Expert Insights and Case Analyses
Consult a mix of peer-reviewed studies, specialty veterinary surgery journals, industry white papers, and curated case repositories for expert views on instrument failures and maintenance strategies. Practice critical appraisal — check methodology, relevance to veterinary settings, and manufacturer claim credibility — to translate findings into local practice. Department debrief archives and supplier learning hubs complement external literature with locally relevant examples. Vettrix Supplies’ blog and learning hub are recommended for applied case studies and product-to-guidance mappings that show how instrument choice and care interact in real clinical workflows.
These curated sources help students compare best practices with documented outcomes and adopt evidence-based maintenance and procurement strategies.
Frequently Asked Questions
What are the signs that a surgical instrument needs to be retired?
Retire an instrument if you see visible corrosion, pitting, or discoloration — signs that integrity is compromised. Mechanical problems such as loose hinges, misalignment, or persistent dullness despite sharpening are also retirement triggers. Instruments that fail tactile checks — feeling gritty or showing excessive play — should be removed. Keep documented records of these observations to help maintain a safe surgical environment and ensure only reliable tools are used.
How can veterinary students effectively communicate instrument issues during surgery?
Speak up clearly and specifically: say “scissors are dull” or “needle holder is slipping.” Use an agreed protocol — a raised hand, a set phrase, or another clinic standard — so concerns are heard promptly. Practice assertive but professional language to build confidence and foster a safety culture where everyone feels empowered to report potential risks.
What role does teamwork play in preventing instrument failures during surgery?
Teamwork spreads responsibility for instrument safety. Everyone should know their role in pre-op checks, including who inspects which tools and how to report concerns. Open communication lets the team address issues proactively. Regular post-op debriefs reinforce team learning, helping the group reflect on successes and improvement areas to reduce the chance of future failures.
How can students stay updated on best practices for instrument maintenance?
Stay current by engaging with professional veterinary bodies, attending workshops, and following online forums. Subscribing to veterinary journals and newsletters brings the latest research and practical tips. Use resources like Vettrix Supplies’ blog and learning hub for applied guides and case studies, and seek mentorship from experienced clinicians to deepen practical understanding of evolving best practices.
What are the consequences of neglecting instrument maintenance?
Neglect leads to higher risks of surgical complications, longer operation times, and increased infection rates. Instruments that fail during procedures can cause extra surgeries or extended recoveries. Financially, clinics incur emergency replacement costs and potential legal liabilities. Ethically, poor maintenance undermines duty of care and damages trust with clients and the community.
How can veterinary students develop a habit of regular instrument inspection?
Make inspections part of your routine: use a simple pre-op checklist and schedule checks before and after each procedure. Practice in simulation labs and role-play scenarios to build confidence in identifying issues. Seek regular feedback from instructors and peers and track inspections in a log to reinforce the habit and demonstrate competence.
Conclusion
Understanding veterinary surgical instrument failures gives students practical skills that improve patient safety and surgical outcomes. By recognizing common failure modes and following proven maintenance routines, students can reduce the risk of intraoperative problems. Engaging with case studies and hands-on resources helps build a proactive culture of care and informed decision-making. Explore our curated training materials and resources to strengthen your instrument-handling skills and confidence.